100% headless setup for a Raspberry Pi
How to get a Raspberry Pi up and running on your network without needing to plug in a keyboard/mouse/monitor/network cable.
TL;DR—use the secret menu in Raspberry Pi Imager to enable SSH and add your Wi-Fi settings to the OS image that’s written to the SD card.
Quick version
- Get your SD card ready and run Raspberry Pi Imager.
- In Raspberry Pi Imager, choose the Operating System Image (e.g. Raspberry Pi OS) and Storage (your SD card).
- Click the Gear icon or use the Ctrl+Shift+X keyboard combo to open the Advanced options menu to set a hostname, enable SSH, set username and password, and enter your wireless LAN network name and password.
- After the Operating System is written to the SD card, eject the card, plug it in to the Raspberry Pi, and boot it.
- After the Raspberry Pi boots and runs the first-run setup scripts, SSH in to the Raspberry Pi from your regular computer to complete the setup.
What’s a headless setup and why do you want to do it?
‘Headless’ is usually used to refer to a computer that runs without a monitor, keyboard, mouse, or other peripherals attached.
When you’re setting up a Raspberry Pi it’s a large hassle to switch cables around from your main computer to the Raspberry Pi if you don’t have a spare keyboard, monitor, and mouse, especially if you want to use your main computer to type WHY ISN’T IT WORKING into Google.
A ‘headless setup’ means being able to set up your Raspberry Pi without needing to plug in a keyboard, monitor, or mouse.
How do you do it with a Raspberry Pi?
You need to have the Raspberry Pi make a network connection when it starts up, and have SSH enabled on the Raspberry Pi so you can open an SSH session from your main computer.
The Raspberry Pi OS image is written to the SD card with the Raspberry Pi Imager software.
Since version 1.6 of Raspberry Pi Imager there’s been a semi-secret ‘Advanced options’ menu that can be used to customise parts of the OS image that is written to the SD card.
The secret menu is accessed from the first screen of the Raspberry Pi Imager with the Ctrl+Shift+X keyboard combination. Newer versions of Raspberry Pi Imager have a gear icon that you can click to open the menu, after you’ve selected the Operating System to install.
The Ctrl+Shift+X keyboard combination opens a menu with options to enable SSH and enter your Wi-Fi network SSID and password. Set a different hostname if you don’t want to use raspberrypi.
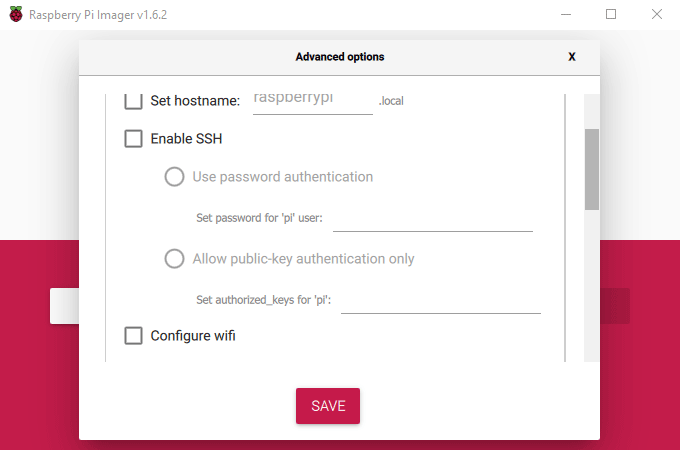
With those details entered the Raspberry Pi can connect automatically to your Wi-Fi network, and you can connect with SSH from your main computer to start working with it.
Before the secret menu was added it was possible – but a bit tricky – to do a headless setup by adding and editing some config files on the SD card before booting the Raspberry Pi for the first time.
That’s super easy why are you even writing about it?
It’s actually super super easy: watch the video How to use Raspberry Pi Imager.
I used to set up a new Raspberry Pi by stealing HJ’s keyboard and mouse and switching around monitor cables and all that.
After I got in trouble for repeated mouse-theft I figured out how to do the add-and-edit-config-files-on-the-SD-card method for headless setup.
Then when while I was making notes on how to do that I found out about the newly-added secret menu.
But I’ve got all these notes and maybe you’ll find them helpful?
Basic setup plan
- Fully headless setup: no extra mouse, monitor, or keyboard.
- The Raspberry Pi connects automatically to your Wi-Fi network on boot.
- You can then SSH to it from your regular computer to complete the rest of the setup.
What you need
- Raspberry Pi. (I used an rPi4 most recently but it’s probably all the same.)
- SD card.
- SD card reader/writer.
- OS image. (I used ‘Raspberry Pi OS with desktop’.)
- Raspberry Pi Imager. (Use v1.6 or higher if you want to use the secret menu.)
How to
Preps
Save the Raspberry Pi OS image and the Raspberry Pi Imager executable somewhere convenient, like maybe a folder on your desktop.
Install Raspberry Pi OS to the SD card
Plug in the SD card reader/writer.
Start up Raspberry Pi Imager.
Use the Ctrl+Shift+X keyboard combination to open the secret menu; enter your SSH and Wi-Fi details. Change the hostname if you don’t want it to be raspberrypi.
Now select the OS image and the SD card where you’ll be writing that image.
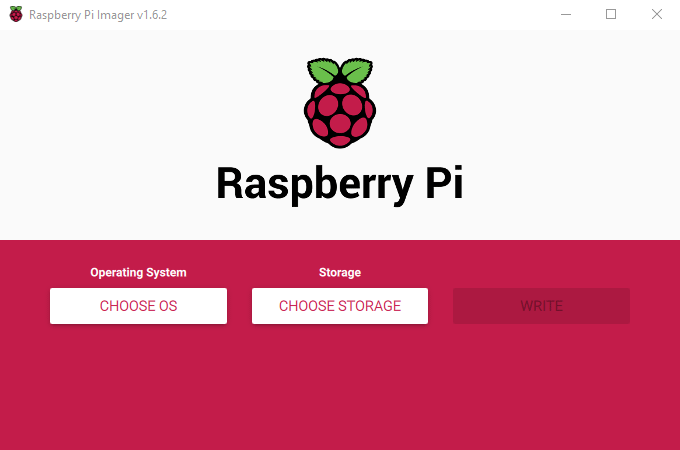
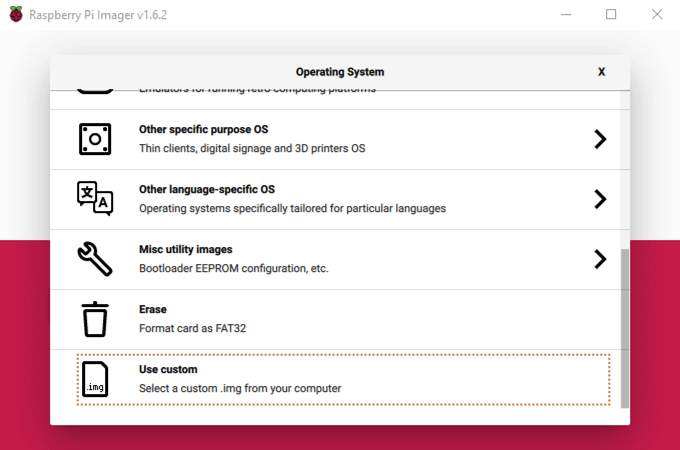
Pick the SD card. (Don’t choose the wrong disk by accident. Check that the disk size matches—if your SD card is 32GB then don’t pick the 500GB SSD that has your Windows installation on it.)
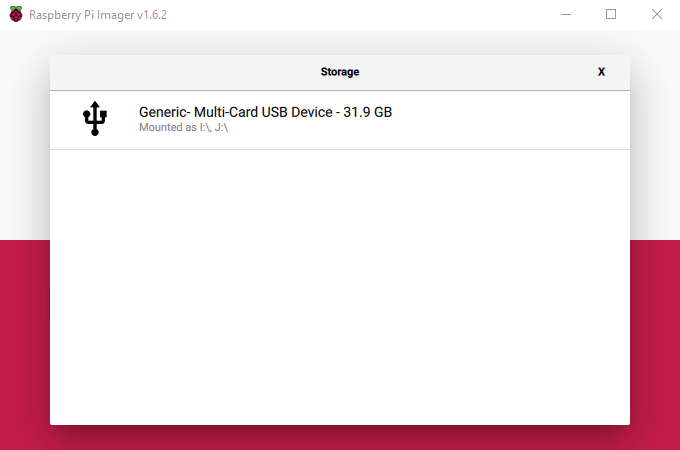
All set? Click the Write button. Verify the image after it’s written.
Eject the SD card when done.
Boot up the Raspberry Pi and SSH in there
Slide the SD card into the Raspberry Pi, power it up, and give it a while to boot and get through its first-run setup scripts.
Then ssh pi@raspberrypi (or whichever hostname you entered in the secret set up menu), enter your password, and … you’re all go?
It didn’t work?
- Try waiting a while longer for the first-run setup scripts to finish?
- Log in to your router and see if your Raspberry Pi shows up on your network with an IP address instead of the hostname?
- It doesn’t show up on your network? Maybe it’s that thing where it won’t join a 5G Wifi network because of reasons and you have to connect to a 2.4G Wifi network. Yes? Now you have to set it up all over again with your 2.4G network details (or plug in an Ethernet cable).
Post setup
SSH in there and:
Change the default password if you didn’t already?
- Type passwd at the command prompt and follow the instructions.

Change the hostname, if you didn’t already? (Maybe you have more than one Raspberry Pi on your network?)
- Type
sudo raspi-configat the command prompt to open the Raspberry Pi Software Configuration Tool. - Hit Enter on
System Optionsand then on again onHostname.
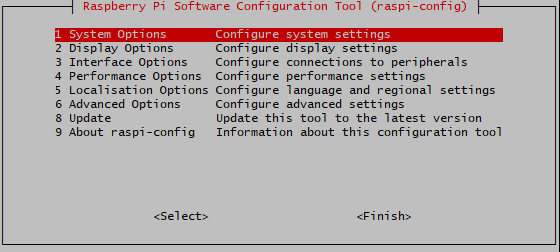
Finally, update the OS with the sudo apt update && sudo apt full-upgrade -y && sudo apt autoremove -y command. (Do this last, because it may take ages to complete.)
Now what?
Your Raspberry Pi is all set up.
Now you could set up password-less login with an SSH key, install Pi-Hole to block ads and malware domains, control a camera with gphoto2, get VNC working so you can control the Raspberry Pi with an iPad, or whatever it was you’d planned to do when you impulse-purchased it.
Notes
I started making detailed notes on the add-and-edit-config-files-on-the-SD-card method for headless setup so I’d have all the information in one place instead of having to go searching for it.
The secret ‘Advanced options’ menu in Raspberry Pi Imager made those notes obsolete.
If you do enjoy fighting against computers you might like to try the add-and-edit-config-files-on-the-SD-card method.
You’ll (probably) find the information you need for that in the links below.
Links
Installation and configuration documentation on the Raspberry Pi site
- Installing on Windows
- Using raspi-config
- Headless install with Wifi
- Backup Wifi in wpa_supplicant.conf
Enabling SSH before first boot
- How to enable SSH on Raspberry Pi (phoenixNAP)
- How to enable SSH on Raspberry Pi OS Without a Screen (howchoo)
Setting up the Wifi connection before first boot
- How to set up Wifi on your Raspberry Pi without a monitor (howchoo)
- Setup WiFi on a Pi manually using wpa_supplicant.conf (Raspberry Pi Spy)
Sponsor-presented message:
This post is brought to you by the Eighteenth Annual Auckland Arrhythmic Gymnastics Festival. “Don’t feel the rhythm. Feel a rhythm™©”
