Use the :target CSS pseudo-class to make a basic choose-your-own-adventure story
An explainer of the programming for the interactive short story that goes with the music on lackscoldfacts.com.
How it started …

How it’s going …
(Still on step 5 :/)
This is an explainer of how I used the :target CSS pseudo-class to make an interactive short story to go with the music at lackscoldfacts.com.
TL;DR: set all the ‘scenes’ of the story to opacity: 0; when a scene is the target, set its opacity to 1. (There’s a bit more, but that’s the main part.)
What’s a :target pseudo-class?
I was going to write my own explanation of :target, but fffuel’s Visual Guide to CSS Selectors says it well enough for me. (Great guide, btw)
The
:targetpseudo-class selects an element with an ID attribute matching the URL fragment (eg: https://example.com/#fragment).https://fffuel.co/css-selectors/#target
:targetis often used to style sections of a page that are directly linked to, typically used with in-page links.
You’ve seen in-page links before. You click a link, and the page scrolls up (or down) to a different part of the page. Like the “Up to the top” link at the bottom of this page.
Anyway, getting to the point …
You don’t have to use :target only for in-page links.
You could, if you wanted, make a sort of choose-your-own-adventure story using :target to show and hide different parts of the story as you click through it. No need for a framework or library, just a bit of HTML and CSS, with a light sprinkling of JavaScript.
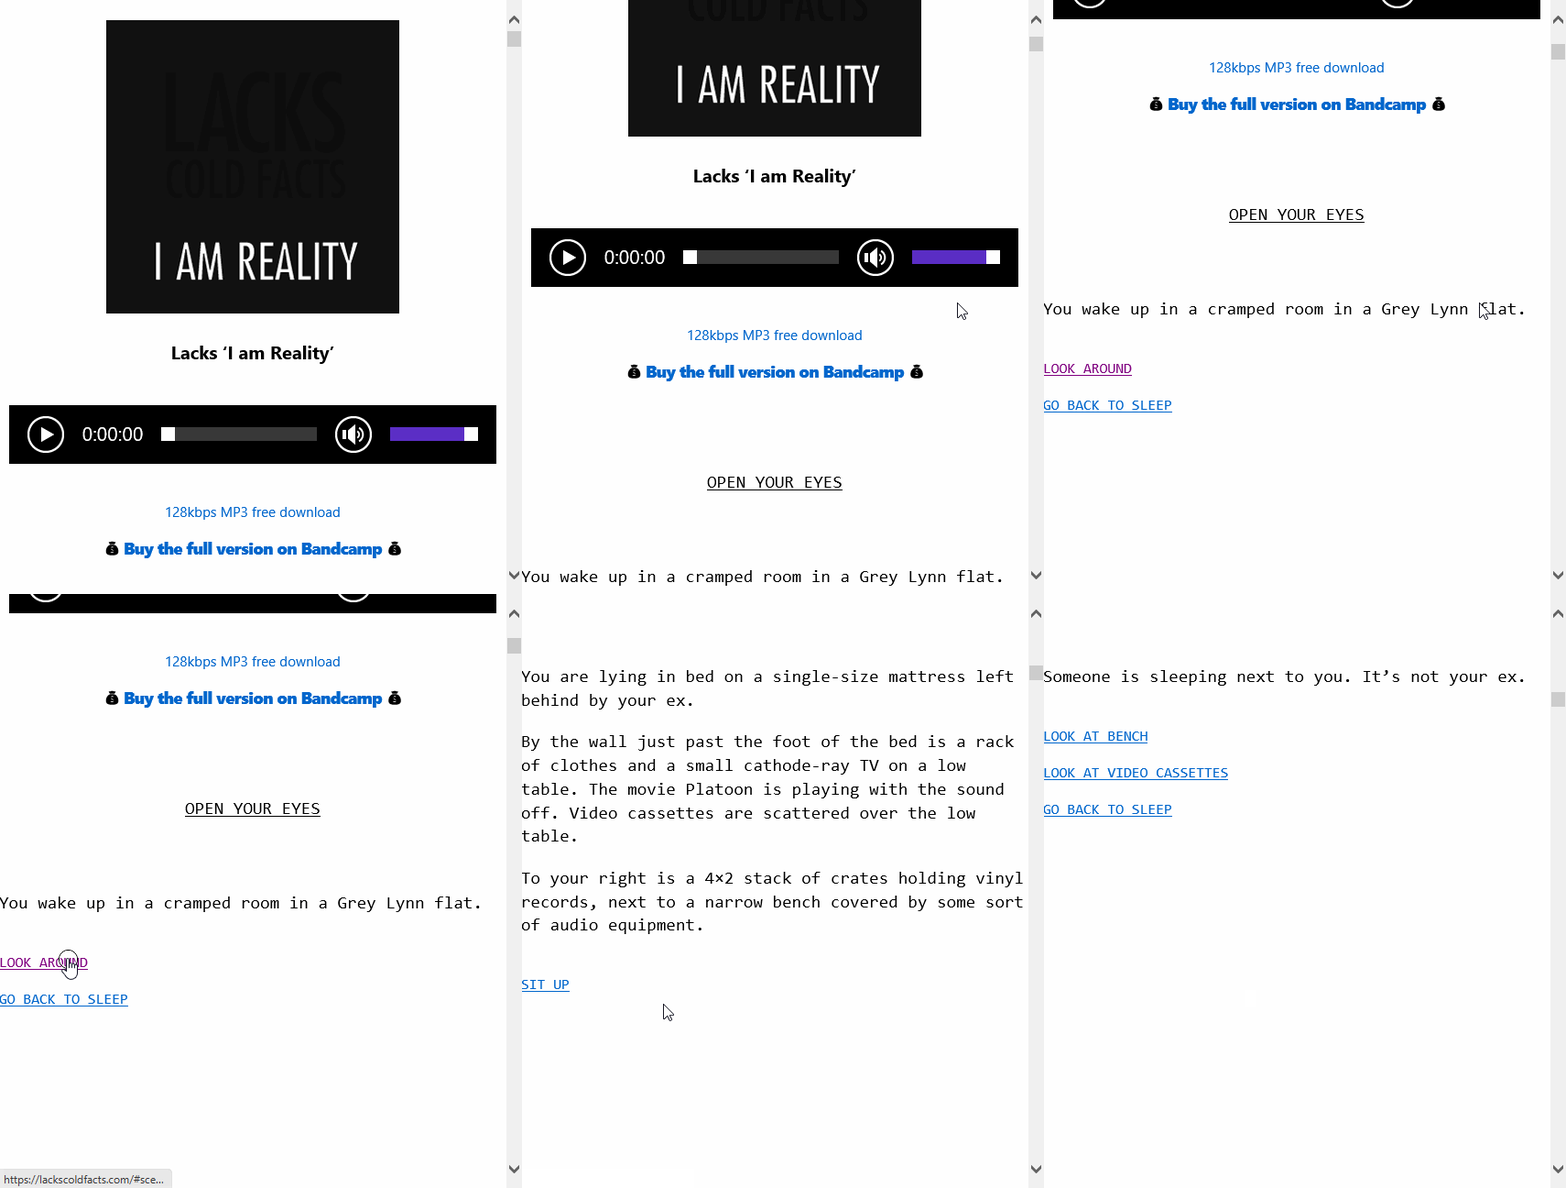
A little bit like this:

And here are a few comments on how I built it.
HTML structure
Main parts only:
<section class="story">

	<p id="start">
		<!-- Story header, OPEN YOUR EYES etc here -->
	</p>

	<div class="scenes">

		<div class="scene" id="scene1">
			<!-- scene1 stuff here -->
			<ul class="scene-links">
				<li><a href="#scene2">Look around</a></li>
				<li><a href="#start" onclick="toggleStartText()">Go back to sleep</a></li>
			</ul>
		</div>

		<div class="scene" id="scene2">
			<!-- scene2 stuff here -->
		</div>

		<!-- ... more scenes, etc, etc -->

	</div>

</section>
That’s all basic.
All of the story is wrapped in a <section> with the .story class.
There’s a p#start which acts as a container for the header of the story.
Then there are a bunch of div.scene’s with unique IDs.
In each of the div.scene’s are in-page links to other scenes in the story.
CSS
The :target pseudo-class is well-supported by modern browsers—it’s available for use with anything better than Internet Explorer 8.
Basic CSS for any old browser
I coded this so the story would work (roughly) on any old browser, with the enhanced version shown only to browsers that support :target.
Main parts only:
#start {
	text-align: center;
	padding-top: 3rem;
	margin-bottom: 0;
	z-index: 100;
	position: relative;
}

.scene {
	margin: 0 0 100%; /* default in case :target isn't supported */
	padding-top: 3em;
}
The padding-top: 3em is used to make a gap between the #start or .scene content and the top of the screen.
A bottom-margin: 100% is added to all scenes, so any old browser gets only one scene on the screen at once. (No spoilers.)
CSS for browsers that support :target
Main parts only:
@media only screen {

	.scenes {
		position: relative; /* So the .scene divs can be absolute positioned inside */
		margin-top: -4rem;
		z-index: 5;
		overflow: visible;
	}

	.scene {
		margin-bottom: 0; /* Remove the excessive margin */
		opacity: 0; /* Hide them all until they become the :target */
		position: absolute; /* Stack them all at the top */
		top: 0;
		left: 0;
		transition: opacity 1.5s;
		z-index: 1;
		padding-bottom: 1rem;
		padding-top: 5rem;
	}

	.scene:target {
		opacity: 1;
		z-index: 2; /* goes on top of the other .scenes */
	}

}
Styles on .scenes
The position: relative makes it the containing block for the absolutely-positioned .scene divs. The negative margin-top is just for the layout.
Styles on .scene
The position: absolute and top: 0 stacks all the .scene divs on top of each other at the top of the .scenes container. The opacity: 0 makes them all invisible.
Styles on .scene:target
When a .scene is also the :target it becomes visible. The opacity: 1 in this rule wins vs. .scene’s opacity: 0 because .scene:target’s higher count of selectors gives it higher specificity.
Why are those rules wrapped in a media query?
I’d initially used @supports selector(:target) to hide the enhanced version from old browsers.
The CSS @supports selector() works for any non-Internet Explorer browser. Wrapping the styles for the enhanced version in an @supports selector(:target) block would mean that those enhanced styles would be ignored by any version of Internet Explorer.
But :target works fine for Internet Explorer 9 and up.
CSS3 media queries also work for Internet Explorer 9 and up, and that (roughly) matches the support for :target.
So I used a plain media query to wrap the enhanced styles, instead of @supports selector(:target), with the same result: the enhanced styles are ignored by browsers that don’t support :target.
And the story still kind of works in older versions of Internet Explorer, as shown below.

Why bother with progressive enhancement for Internet Explorer when no one uses it any more?
Yeah it’s a still a habit I guess, whatever.
JavaScript
Clicking through most of the story works without JavaScript, but some parts just won’t work without it.

But this post was supposed to be about :target, so I’ll skip the JavaScript details. (View-source at lackscoldfacts.com to see the JavaScript, vanilla, non-minified, with comments.)
If I was building this again
- To stack the
.scenedivs, I’d use CSS grid layout instead of absolute positioning. See this article for an example. - Instead of using padding on the
.scenedivs to make a gap between the content and the top of the page, I’d look at usingscroll-paddingfor the:target. For an example,Ctrl+Ffor the mention ofscroll-paddingin the CSS Reset Additions section of this Modern CSS article. - Instead of using
#scene1,#scene2, et cetera, for the IDs of each scene, I’d consider using some sort of hash for the ID, to make it easier to add, remove, or re-order scenes. (e.g.#a4f14dinstead of#scene1)
DIY?
It’s all in the source-code at lackscoldfacts.com.
Try it out?
Visit lackscoldfacts.com, click the flashing OPEN YOUR EYES to get started.
